What you will end up with
By the end of this guide you will have a working Kanban board with columns, at least one issue visible on the board, and one teammate invited to your workspace.
- One workspace with one Kanban board.
- At least one issue moved from To do to Done.
- At least one teammate invited.
The Free plan is sufficient to complete all steps below. See Billing & plans if you want to understand plan limits before starting.
Step 1 — Create your organization
An organization is the top-level container that owns your workspaces and defines your URL
(example: acme.ouraboard.app).
- After signing up, you are prompted to create an organization.
- Enter a short, memorable handle (example:
acme-corp). This becomes part of your workspace URL and cannot be changed later. - Confirm — you land on the main dashboard.
Step 2 — Create a workspace
A workspace is a delivery area for a team or product. Start with one. You can add more later if you need to separate teams or products completely.
- From the dashboard, click New workspace or use the workspace switcher in the sidebar.
- Give it a name (example:
Product). - Confirm — workspace appears in the sidebar.
See Organization & workspace for guidance on when to create multiple workspaces.
Step 3 — Create a project
A project groups related boards and issues together (example: Mobile App, Backend API).
- In the sidebar, click Projects → New project.
- Enter a project name and confirm.
- Project appears in the sidebar under your workspace.
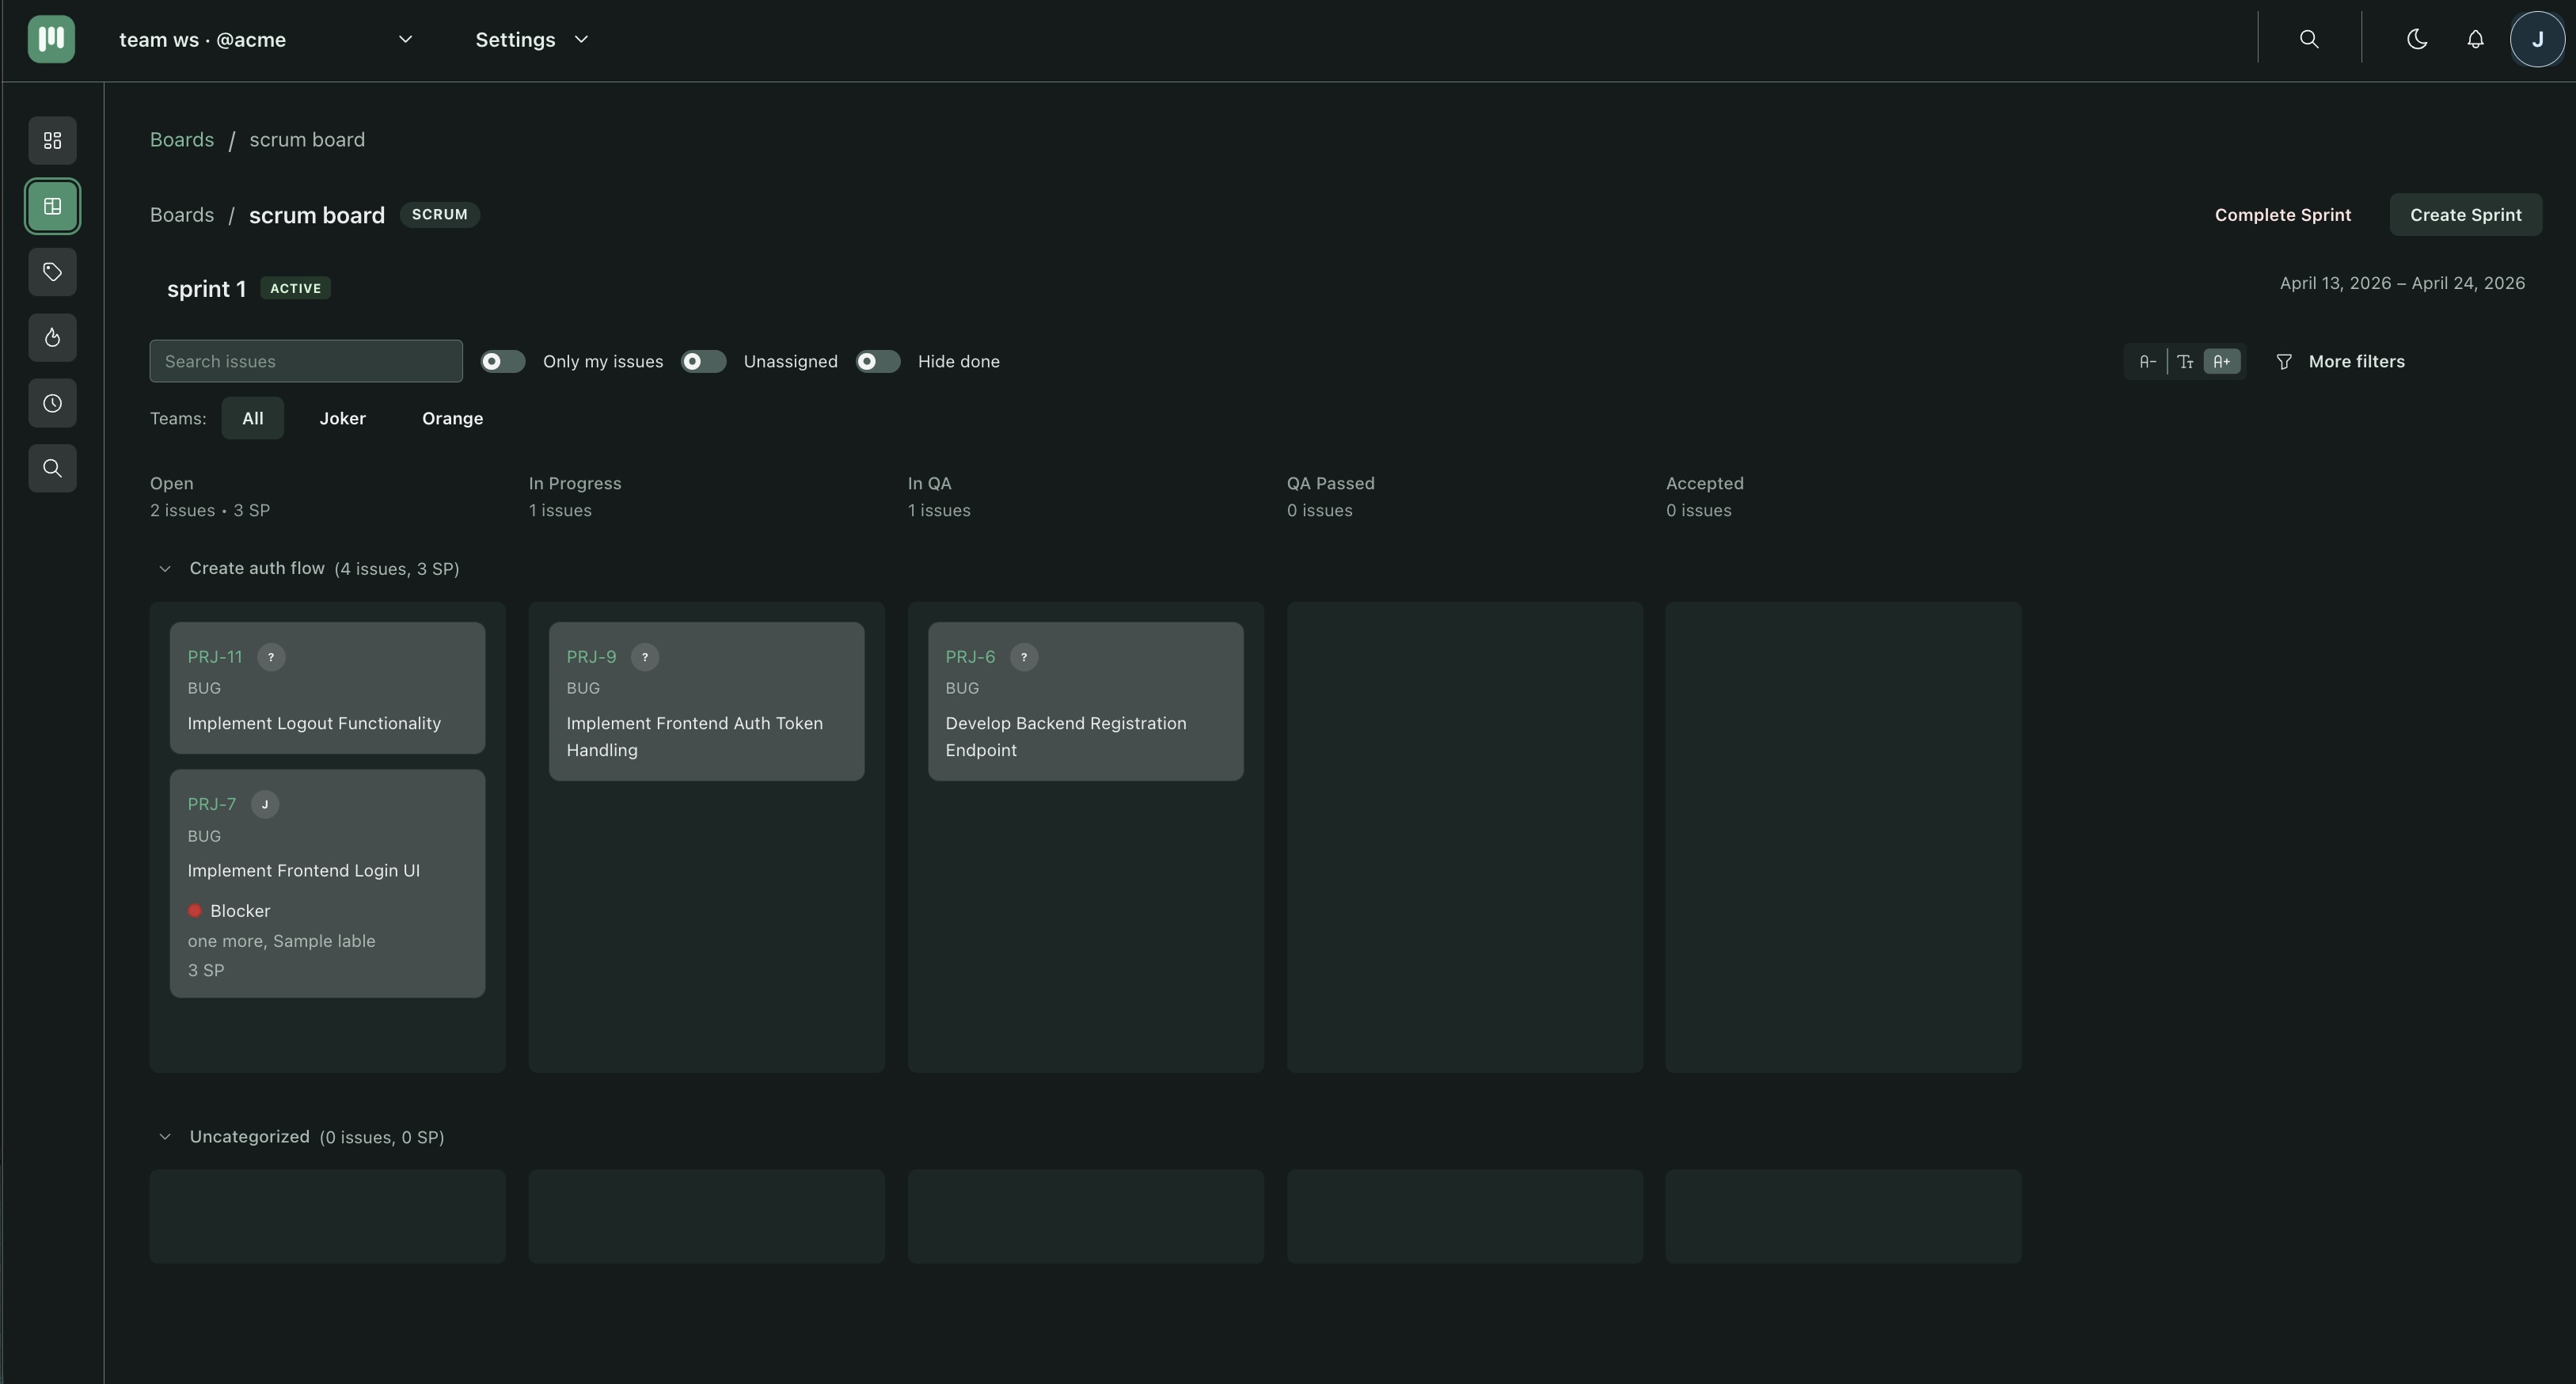
Step 4 — Create a board
A board is where issues move through your workflow. Choose Kanban for continuous flow, or Scrum if you work in time-boxed sprints.
- Inside the project, click New board.
- Choose board type: Kanban for your first board.
- Give it a name (example:
Main board) and confirm. - Board opens with default columns already created.
Recommended first columns
Start simple. You can add more columns once the team has agreed on process.
- To do
- In progress
- Done
Step 5 — Add or adjust columns
If default columns were created in step 4, you can skip this. To add a column:
- Click + Add column at the right edge of the board.
- Enter a column name and confirm.
Columns can be reordered by dragging. Column names and order are managed in Workspace Settings → Board columns.
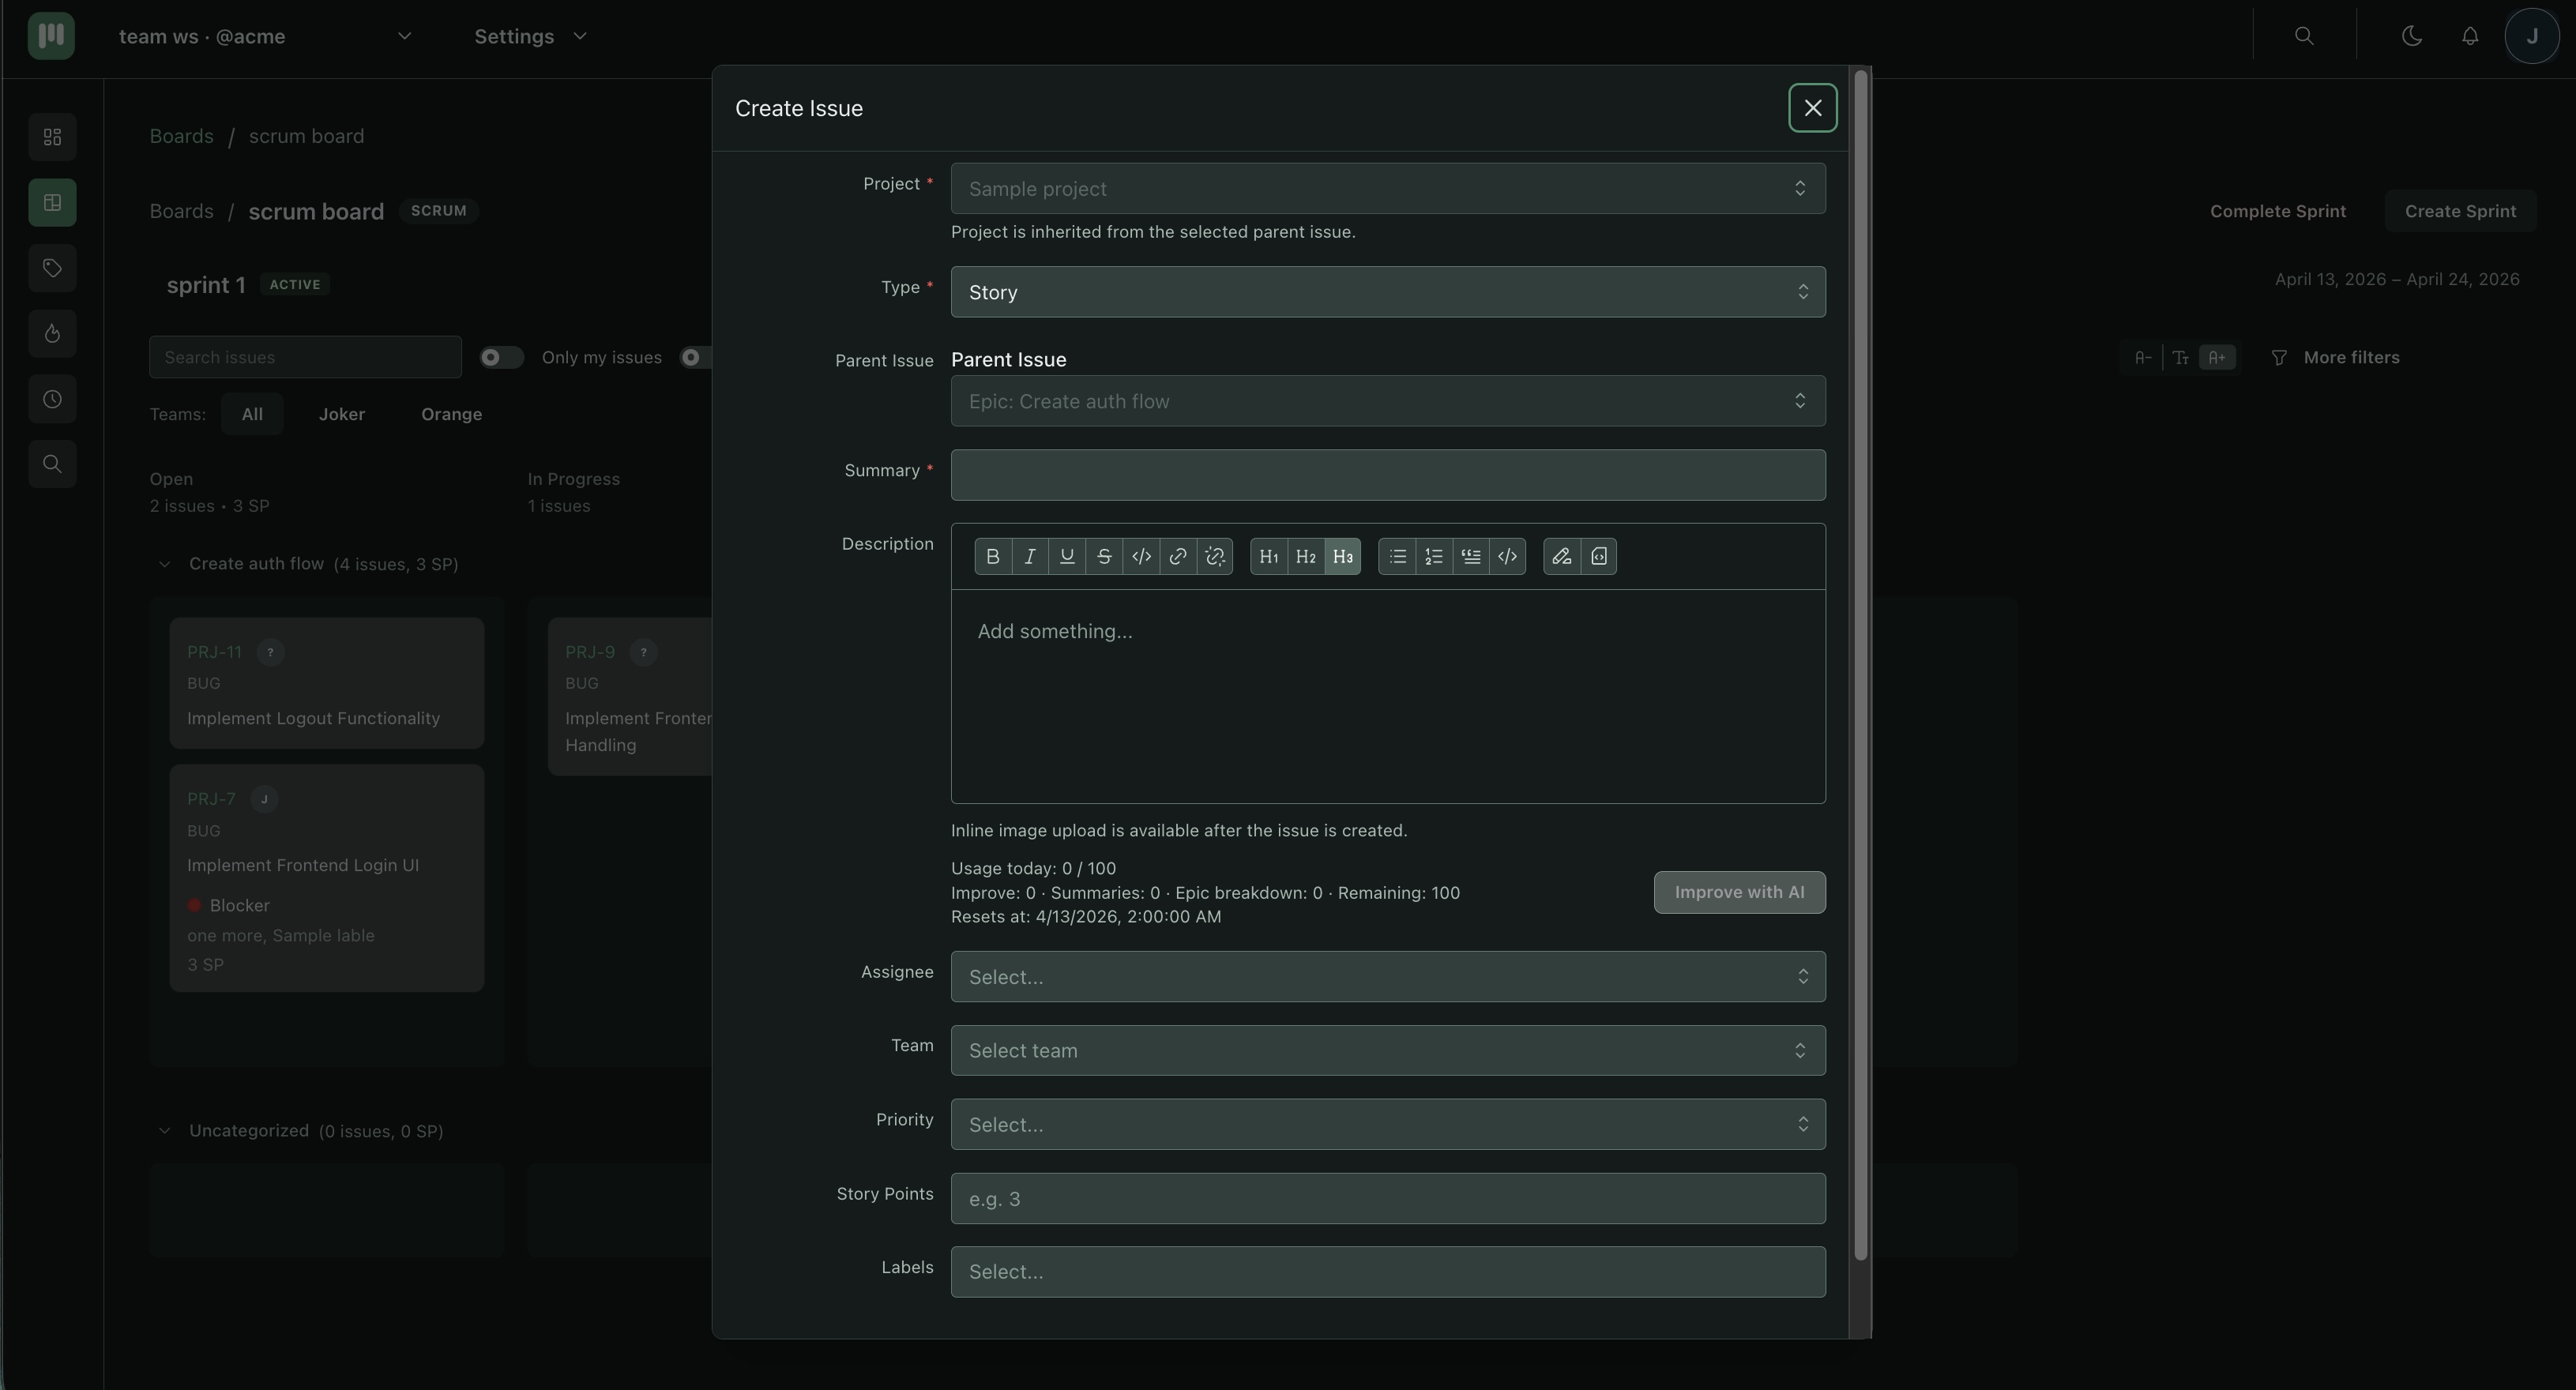
Step 6 — Create your first issue
Issues are the core unit of work — tasks, bugs, features, or epics.
- Click + in the To do column header, or click New issue in the top bar.
- Enter a title (example:
Set up CI pipeline). - Optionally set Assignee, Priority, and Type.
- Confirm — the issue card appears in the column.
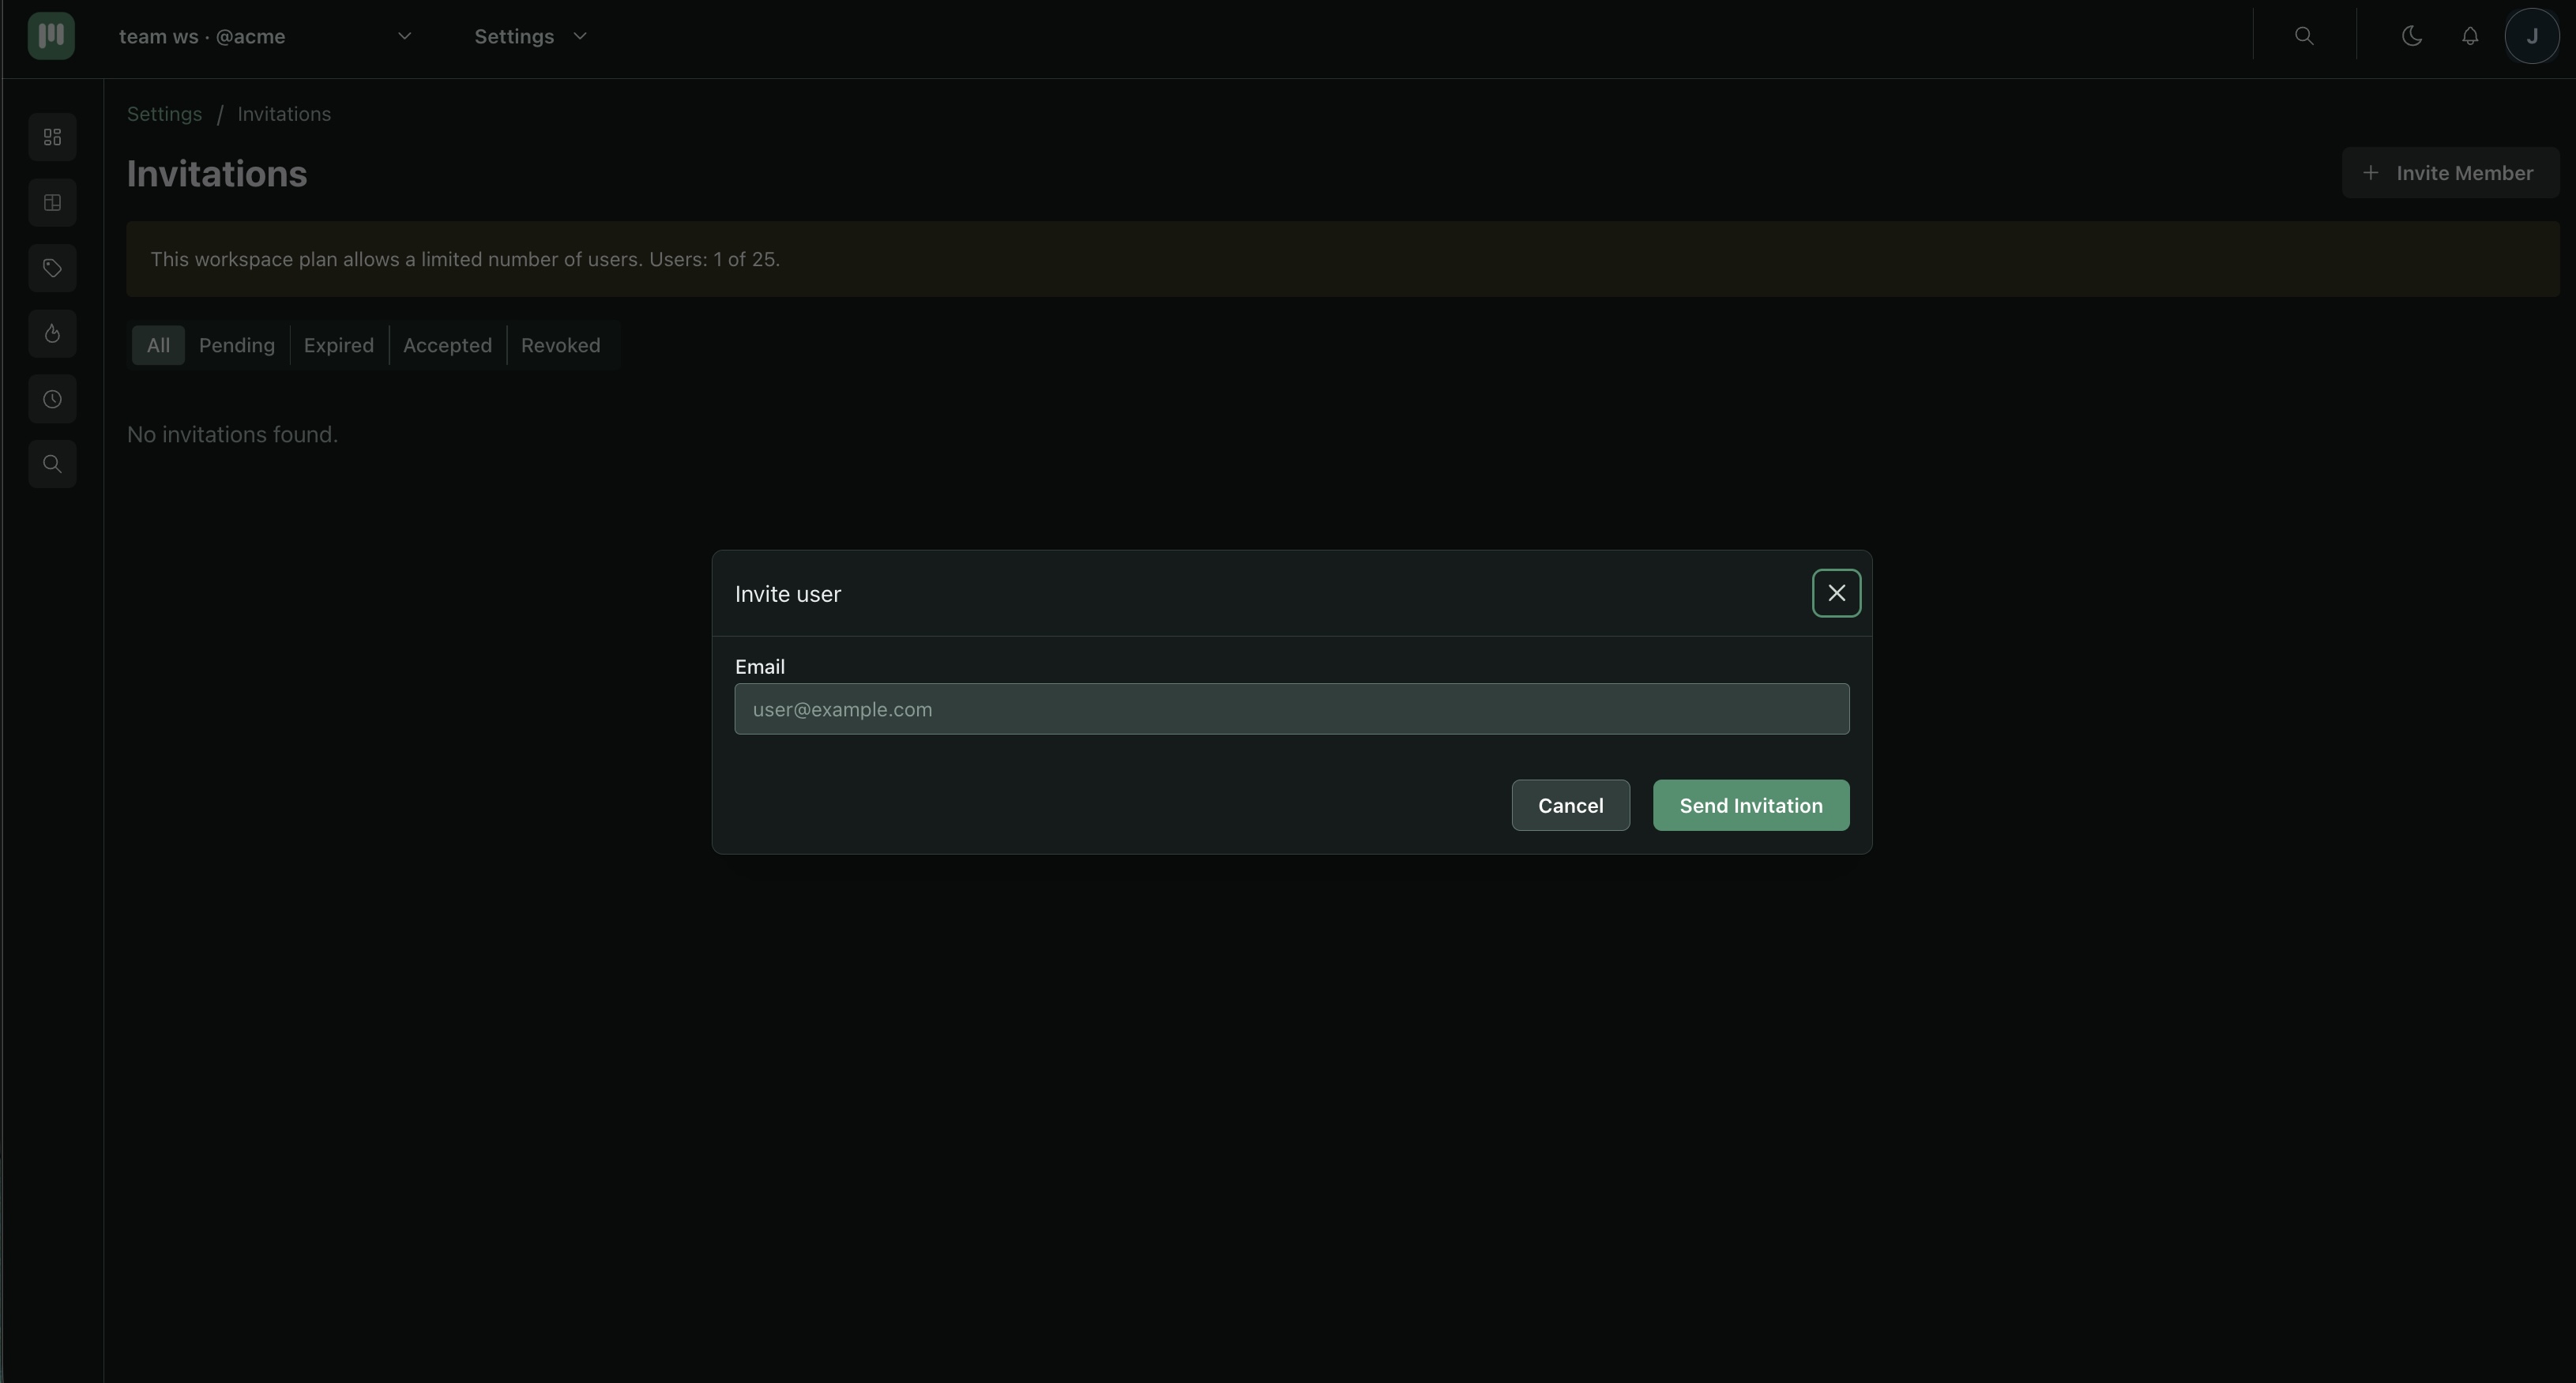
Step 7 — Invite a team member
Workspace members can view and work on issues. The MEMBER role is the right default for most people. See Permissions for the full breakdown.
- Open Workspace Settings → Members.
- Click Invite member.
- Enter the email address and select a role (MEMBER is the default).
- Send invite — the member appears as Pending until they accept.
Step 8 — Move the issue
Drag the issue card across columns to track its progress.
- Drag the card from To do to In progress.
- Drag it again to Done.
You can also open the issue and change the Status field directly if you prefer not to drag.
What's next
- Permissions — understand what each role can and cannot do.
- Organization & workspace — when to create multiple workspaces.
- Billing & plans — Free vs Premium vs Team plan limits.
- AI features — improve descriptions, summarize discussions, and split epics automatically.
- GitHub integration — link commits and pull requests to issues.